![]() And we're back! In part one we looked at setting up a tinted palette for drawing our 8-bit masterpieces to canvas. Here's what we're going for today: rendering colourised sprites and tiles. We'll be loading in the 4-color sprite sheet and rendering tiles from it with our chosen colours.
And we're back! In part one we looked at setting up a tinted palette for drawing our 8-bit masterpieces to canvas. Here's what we're going for today: rendering colourised sprites and tiles. We'll be loading in the 4-color sprite sheet and rendering tiles from it with our chosen colours.
We need the InitPalette and GetColour functions from last time, though the InitPalette function will now store the 216 colours as JavaScript objects (with r, g, and b components) rather than the encoded version:
// Before:
colours.push(r1 << 16 | g1 << 8 | b1);

// After:
colours.push({
  r: r1,
  g: g1,
  b: b1
});
This saves us from having to decode the value before we use it - which is much more practical in JavaScript, because the canvas image data is stored as separate rgba values by default.
On with the new stuff. First up is to make sure we can draw pixels to our canvas element. The process goes like this...
- Get the canvas's image data with the
createImageDatafunction. - Manipulate the bits of the data as we desire
- Replace the canvas data using the
putImageDatafunction - Repeat from step 2
All the JavaScript you see is "inline" for simplicity. All functions are global (and for some reason I uppercased the function names - I sometimes go a bit weird when writing tutorials). A lot of arrays are passed by reference... It's for demonstration purposes only! Namespace things, mix'em in, plaster some classical OOP on them, make them into endo-functing monads... REMEMBER: This isn't production code, it was just me dissecting and porting Minicraft!
Drawing pixels with canvas
Right, first we grab the canvas context and keep a reference to the image data. We'll also populate our palette, ready for using.
<canvas id="board" width="160" height="120"></canvas>
...
var ctx = document.getElementById("board").getContext("2d"),
    output = ctx.createImageData(ctx.canvas.width, ctx.canvas.height),
    colours = [];

// Set up our palette
InitPalette(colours);
Then we run a loop where we pick a random colour index (from the 216 we generated) and put it in each pixel. The canvas data is stored 4 bytes per pixel (rgba) and we put 256 for alpha (opaque).
(function run() {
  for (var y = 0; y < ctx.canvas.height; y++) {
    for (var x = 0; x < ctx.canvas.width; x++) {

      // Pick a random palette colour
      var cc = ~~(Math.random() * 216),
          xo = x * 4,
          yo = y * ctx.canvas.width * 4,
          col = colours[cc];

      // Replace the canvas image pixel
      output.data[xo + yo] = col.r;
      output.data[xo + yo + 1] = col.g;
      output.data[xo + yo + 2] = col.b;
      output.data[xo + yo + 3] = 256;
    }
  }

  // Draw it
  ctx.putImageData(output, 0, 0);
  setTimeout(run, 50);
})();
Alright! We have some palatte-ized noise on the screen.

Loading an image
Next, we need to load in the grey-scale graphic file (which is the spritesheet from Minicraft). To load an image as canvas data, we'll create a regular ol' JavaScript image then "paint" it onto a canvas element. Then extract the data from the canvas element and discard the JavaScript image and the canvas element. We just want the datas.
function LoadSpriteSheet(filename, callback) {
  var img = new Image(),
      pixels = [];
  img.onload = function() {
    var can = document.createElement("canvas"),
        ctx = can.getContext("2d");
    can.setAttribute("width", img.width);
    can.setAttribute("height", img.height);
    ctx.drawImage(img, 0, 0);

    var data = ctx.getImageData(0, 0, img.width, img.height).data;

    // The important bit!
    for(var i = 0; i < data.length; i += 4) {
      pixels.push(~~(data[i] / 64));
    };

    // Send it back
    callback && callback({
      width: img.width,
      height: img.height,
      pixels: pixels
    });
  }
  img.src = filename;
}
If you're playing along at home, remember you need to have a web server running to load the image (you can't run this sample from a file:/// url) otherwise you'll get a cross-domain error when trying to manipulate the canvas data.
There's one weird bit in there that is specifically for our colourising code: first, because we only care about greyscale for now - we only look at every 4th byte in the data (because if it's greyscale then r=g=b). And second, every byte that we keep we first divide by 64.
WTF?! Ok, it's a trick... When creating the graphics in his graphics editor, you carefully chose 4 rgb colour values that when divided by 64 (and floored) would return either 0, 1, 2, or 3! That's a handy index for us to work with in code, but at the same time - a decent scale to work in in photoshop.
What we end up with then, is an array sized width * height of integers from 0 to 3. To actually load an image with this function we pass the path and a callback function (because the image load is asynchronous).
var spritesheet = null;
LoadSpriteSheet("sheet.png", function(sheet) {
  spritesheet = sheet;
  run();
});
We then call our run function. For this demo we will blit the spritesheet directly to the output canvas image - this code is almost identical to the "random static" code - except instead of a random colour index, we read the integers from the spritesheet. Because this will only give us a colour from 0 to 3 (which would be from black to very very dark someother colour) we multiply it by, say, 10 - and get the colour from the palette.
function run() {
  for (var y = 0; y < ctx.canvas.height; y++) {
    for (var x = 0; x < ctx.canvas.width; x++) {
      var cc = spritesheet.pixels[x + (y * spritesheet.width)],
          xo = x * 4,
          yo = y * ctx.canvas.width * 4,
          col = colours[cc * 10]; // make it brighter!

      output.data[xo + yo] = col.r;
      output.data[xo + yo + 1] = col.g;
      output.data[xo + yo + 2] = col.b;
      output.data[xo + yo + 3] = 256;
    }
  }
  ctx.putImageData(output, 0, 0);
  setTimeout(run, 50);
};
What you see now is a strangely colourised version of part of the spritesheet. We're getting closer!
A kind of double-buffer
Right, in the next step we'll create an extra array, the same size as the screen, that will represent... the screen. It will hold screen size, the spritesheet, and the pixels to eventually render. All the sprite rendering we will do to this array, and then at the end copy it to the output canvas element.
buffer = {
  width: ctx.canvas.width,
  height: ctx.canvas.height,
  sheet: null,
  pixels: []
},
When the spritesheet is loaded, it is stored in the buffer too (instead of the global variable we made last time). To render the buffer to the output canvas we do exactly the same as before - but pass in the arrays to copy from and too.
function render(buffer, pixels) {
  for (var y = 0; y < buffer.height; y++) {
    for (var x = 0; x < buffer.width; x++) {
      var cc = buffer.pixels[x + (y * buffer.width)],
          xo = x * 4,
          yo = y * buffer.width * 4,
          col = colours[cc];

      if(!col) continue; // Make sure it's defined
      pixels.data[xo + yo] = col.r;
      pixels.data[xo + yo + 1] = col.g;
      pixels.data[xo + yo + 2] = col.b;
      pixels.data[xo + yo + 3] = 256;
    }
  }
}
Now we can re-create our original static - but utilising the buffer:
for (var y = 0; y < buffer.height; y++) {
  for (var x = 0; x < buffer.width; x++) {
    buffer.pixels[x + y * buffer.width] = ~~(Math.random() * 216);
  }
}

// Transfer screen to output buffer
render(buffer, output);
ctx.putImageData(output, 0, 0);
A small step backwards - but now we're rendering noise with our back buffer.
Plotting some sprites
 With our buffer in hand, we can now do some real work! Anything we put into the buffer will end up on the screen - so now we can copy pieces of the spritesheet data straight into the buffer array. We'll make a
 renderTile function that copies an 8 by 8 pixel rectangle from spritesheet to a given x and y location. This code is ported pretty much directly from the original screen.render function.
function renderTile(buffer, xp, yp, tile, colors) {
  var xTile = tile % 32,
      yTile = ~~(tile / 32),
      toffs = xTile * 8 + yTile * 8 * buffer.sheet.width;

  for(var y = 0; y < 8; y++) {
    if (y + yp < 0 || y + yp >= buffer.height) continue; // make sure the pixel is on screen.
    for(var x = 0; x < 8; x++) {
      if (x + xp < 0 || x + xp >= buffer.width) continue; // make sure the pixel is on screen.
      var col = (colors >> (buffer.sheet.pixels[x + y * buffer.sheet.width + toffs] * 8)) & 255;
      if (col < 255) buffer.pixels[(x + xp) + (y + yp) * buffer.width] = col;
    }
  }
}
To render a tile, we pass in the buffer, the position to render, the tile index, and the colour we want to tint the tile with. Most of the code just figures out the correct offset from the spritesheet (notice the magic number "32"? that's because the sheet is 32 x 32 tiles. The magic number 8? Our tiles are 8 x 8 pixels).
But the important line is this whole procedure is this: var col = (colors >> (buffer.sheet.pixels[x + y * buffer.sheet.width + toffs] * 8)) & 255;
This is where the colourising magic happens. The pixel value from 0 to 3 is found from the spritesheet. This is then multiplied by 8 to give either the value: 0, 8, 16, or 24. The colour number is then right shifted by that amount and anded by 255.
Does this sound kind of familiar? It's the inverse of what the ol' GetColour function did - which encoded 4 colour values into 1 integer. This is just doing the opposite: extracting one colour out of the integer and applying it to the correct pixel. The next line then checks that the value is not 255 - which will be our "invisible" colour for transparent areas.
We can call this function for each 8x8 sprite/tile we want to render. The tile number is the integer index into the spritesheet: 0 is the first tile in the first row, 1 is the second tile in the first row, 32 (1 * 32 + 0) is the first tile in the second row, 33 (1 * 32 + 1) is the second tile in the second row...
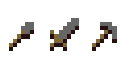
renderTile(buffer, 20, 20, (5 * 32) + 0, GetColour(-1, 100, 320, 222));
renderTile(buffer, 30, 20, (5 * 32) + 2, GetColour(-1, 100, 320, 222));
renderTile(buffer, 40, 20, (5 * 32) + 3, GetColour(-1, 100, 320, 222));
Ah, that's more like it - Three colourised Minicraft tools!
Messing around with it
With the ability to plot tiles and sprites at a given location - we have all we need to make some games! In each of your entity's render functionality you can call the renderTile as many times as you need. For example, to render a background over the whole screen:
for(var y = 0; y < buffer.height / 8; y++) {
    for(var x = 0; x < buffer.width / 8; x++) {
        renderTile(buffer, x * 8, y * 8, 1, GetColour(0, 130, 120, 0));
    }
}
You can plot individual tiles to make a font plotter, or stitch a few tiles together for bigger sprites... whatever you want. Here's the code for the weird demo from the beginning of the article. Notice that the Minicraft players are actually 4 tiles in a square:
var rnd = function(min, max){ if(!max){ max=min; min=0; }; return ~~(Math.random()*(max-min))+min;},
    rndCol = function(){ return parseInt(rnd(5) + "" + rnd(5) + "" + rnd(5), 10); };

// Render peoples
var midX = ~~(Math.sin(new Date().getTime() / 400) * 20) + 70,
    midY = ~~(buffer.height / 2) - 8,
    col1 = GetColour(-1, 1, rndCol(), rndCol()),
    col2 = GetColour(-1, 1, 23, 555);

// Man 1
renderTile(buffer, midX + 16, midY, (14 * 32) + 0, col1);
renderTile(buffer, midX + 24, midY, (14 * 32) + 1, col1);
renderTile(buffer, midX + 16, midY + 8, (15 * 32) + 0, col1);
renderTile(buffer, midX + 24, midY + 8, (15 * 32) + 1, col1);

// Man 2
renderTile(buffer, midX, midY, (16 * 32) + 0, col2);
renderTile(buffer, midX + 8, midY, (16 * 32) + 1, col2);
renderTile(buffer, midX, midY + 8, (17 * 32) + 0, col2);
renderTile(buffer, midX + 8, midY + 8, (17 * 32) + 1, col2);
Check out the Minicraft source (or here on GitHub) - especially the render functions of each entity (eg player.java) to see how animation and rendering based on the player's direction, if they are attacking, etc.
Anyhow... that's it. I'd highly recommend not using any of the code above, but re-implement it yourself from your brain... this code is already ported from Java which was written in a 48 hour game competition, by a mad man - so do yourself a favour and make your own (more idiomatic) version!
It's worth it I think... dynamically colourising sprites like this is a great way to prototype the look and feel of your game, add in old-school colour-cycling effects, and easily add variety to your entities.
2 Comments
Great analysis! I hope there’s a part 3 on the way.
Iv’e been ramming my head on a steel beam trying to figure out the color mechanics in Minicraft. Now I can sleep well tonight!